

In a supermarket, shelves are never just “places to put stuff.” They’re both space-planning tools and silent salespeople that shape what customers buy. Most purchasing decisions happen right in the store—so the type of shelves you pick, their material and style, how high you stack things, how you use end caps and promo spots, and even post-setup maintenance and data tracking all directly affect: whether customers see your products, if they stop to browse, and if they end up grabbing extra items on a whim.
This Creative Guide to Supermarket Shelving breaks down a actionable, repeatable method to boost sales—covering shelf types, materials and weight capacity, creative display strategies, end cap and POP hacks, lighting and color, plus maintenance and performance metrics. Let’s dive in!
1. Think of Shelves as a “Sales System,” Not Just Furniture
If you only see shelves as part of the decor, you’ll fixate on “looking good.” But if you treat them as a sales system, you’ll focus on what really matters:
- Customer flow: How do shelves form aisles that make people want to walk the whole store?
- Visibility: What’s at eye level? What needs a lift or extra lighting to stand out?
- Promo efficiency: Are end caps, promo islands, and checkout POPs eye-catching enough?
- Operational ease: Is restocking, organizing, and cleaning a breeze? Can price tags/info be updated quickly?
- Safety & weight capacity: Are shelves stable, up to code, and able to hold the load long-term?
The goal of shelf design? Make it easier for customers to buy, simpler for stores to sell, and less of a hassle for staff to manage.
2. Common Supermarket Shelf Types: Put the Right Shelf in the Right Spot
Different shelves have totally different strengths and uses. The first step to creativity is picking the right shelf—otherwise, no amount of fancy arranging will help.
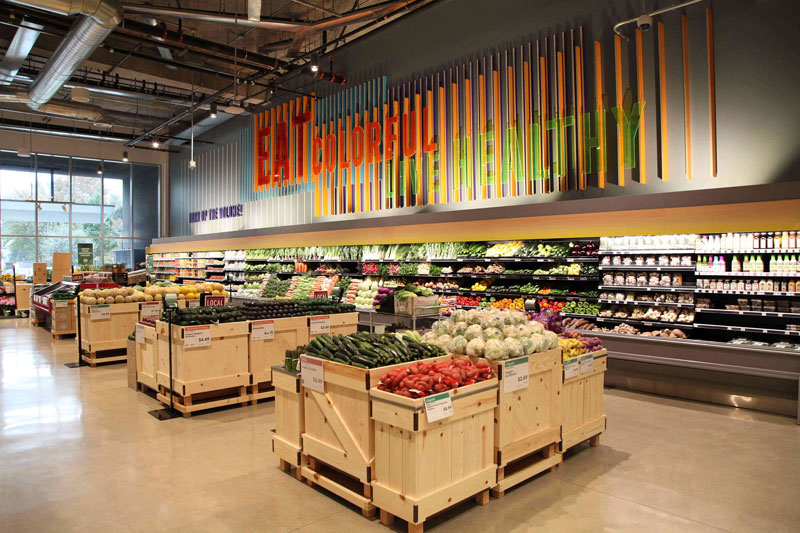
1. Workhorse of Aisles: Double-Sided/Single-Sided Gondola Shelves
- Job: Form the main aisles—they’re the “aisle workhorses” of the store.
- Perks: Adjustable height, shelf angles, and spacing; can add hooks, baskets, dividers, and price tag slots.
- Best for: High-SKU, fast-turnover items like groceries, drinks, personal care, and household cleaners.
- Weight Capacity (Reference):
- Single-sided, 300mm deep: ~40–50kg (standard arms); up to 70–80kg with reinforced arms.
- Single-sided, 450mm deep: ~45–55kg; up to 75–90kg for heavy-duty.
- Double-sided, 300mm per side: ~35–45kg per side; up to 60–70kg per side for heavy-duty.
- Double-sided, 450mm per side: ~40–50kg per side; up to 65–80kg per side for heavy-duty.
- Pro Tip: Don’t just cram gondola shelves full—treat them like “content corridors.” Use end caps, side caps, shelf talkers, and lighting to turn aisles into spaces where customers can browse, discover new items, and make impulse buys.
2. Max Out Vertical Space: Wall Shelving
- Job: Turn walls into selling spaces—perfect for small stores to save floor area.
- Styles: Slatwall systems, grid panels, pipe-style setups, etc.
- Size Reference: Common widths: ~559–1168mm; depths: ~229–762mm.
- Weight Capacity (Reference): Commercial wall shelves usually hold at least 40 lbs per linear foot (~18kg per 30cm—depends on the structure).
- Pro Tip: Walls aren’t just “restock zones”—they’re “brand walls/theme walls.” Use matching colors, negative space, and spot lighting to create a styled display that’s Instagram-worthy and easy to understand.
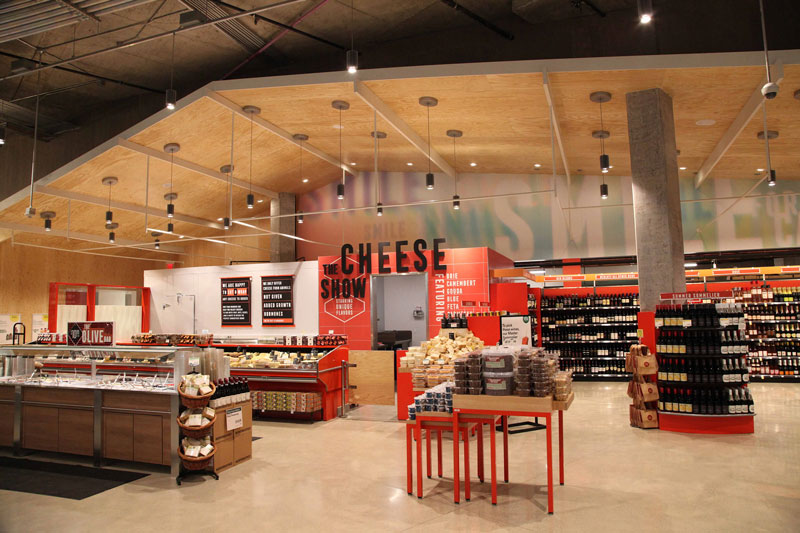
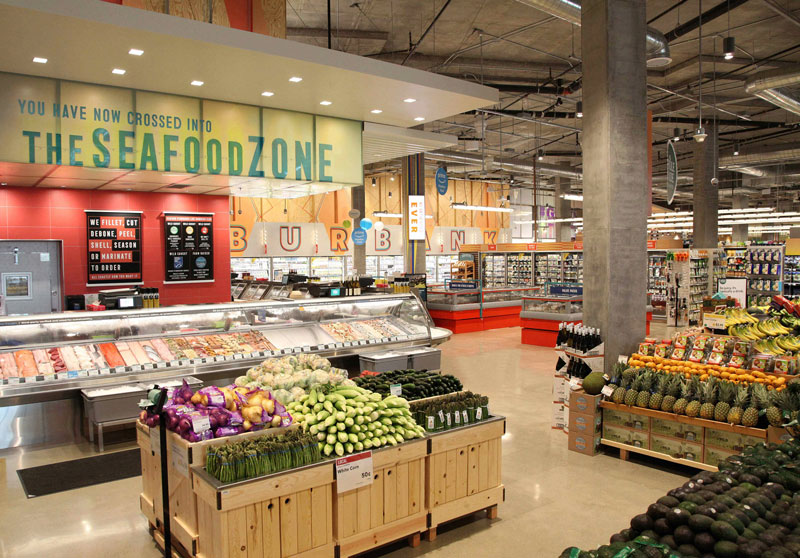
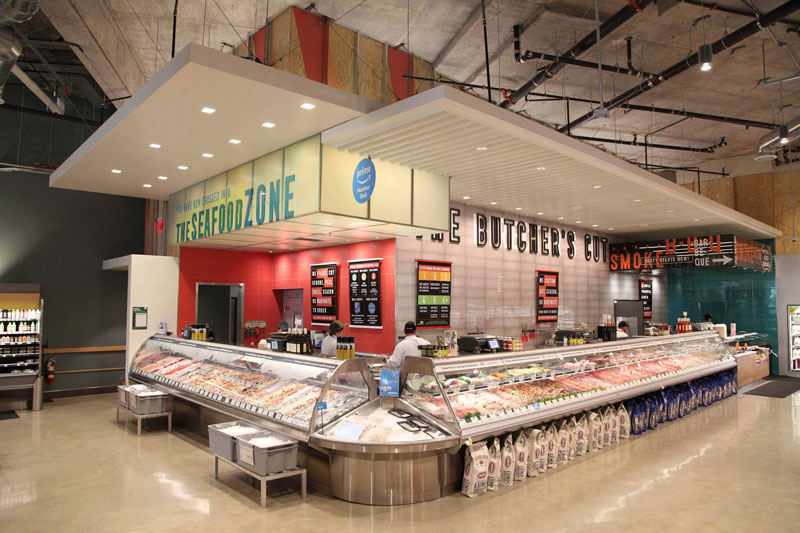
3. Supermarket’s Prime Ad Space: End Caps
End caps sit at the end of aisles, facing main walkways—they’re natural high-visibility promo spots. They’re perfect for:
- High-margin items, new products, seasonal promos.
- “One-stop solution” bundles (e.g., chips + dip, beer + snacks).
- Clearance/discounts (end caps near the entrance work best).
- Key Move: Rotate end caps often. Most stores swap themes every 1–2 weeks to keep things fresh and give customers a reason to come back.
4. Last Chance to Impulse Buy: Checkout Queue POP & Countertop Displays
Goal: Grab those last-minute impulse purchases.Best for: Gum, candy, energy bars, batteries, travel-size products, wipes, small toys, etc.
- Pro Tip: More POP isn’t better. The messier the counter, the fewer impulse buys. Keep it tidy, restock regularly, and use short, straight-to-the-point signs—those usually work best.
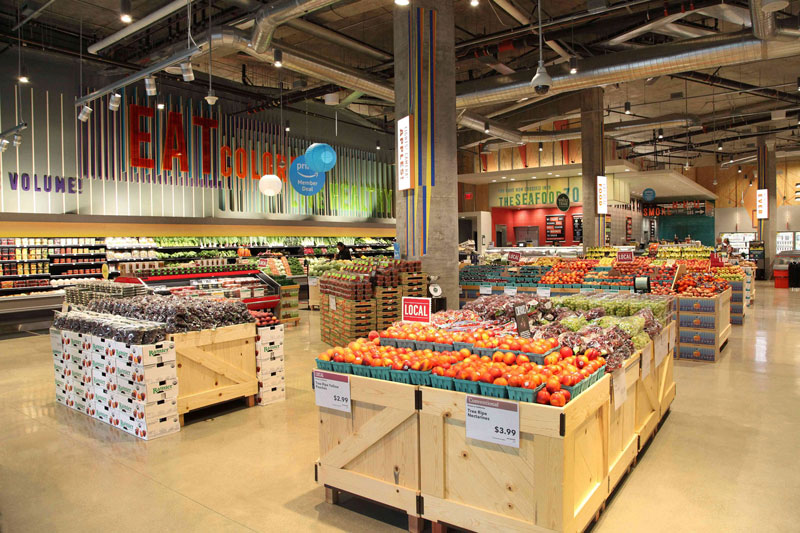
5. Flexible Promos & Events: Free-Standing Display Units (FSDUs) & Mobile Shelves
- Perks: Portable, great for short-term events, and easy to switch up seasonal themes.
- Best for: Stores that want to test new layouts, trial new product spots, or create holiday-themed islands.
- Pro Tip: Portable doesn’t mean random. Place mobile displays in high-traffic areas—entrance, main aisle intersections, next to end caps, or checkout lines. That’s where portability counts.
6. Best for Small & Hanging Items: Pegboard/Slatwall Shelves
- Best for: Hardware bits, hanging snacks, phone accessories, and miscellaneous goods.
- Perks: Flexible hook and accessory combinations—easy to rearrange displays quickly.
Note: Keep hooks the same length. Empty pegboards look “out of stock and cheap”—always keep them fully stocked and neat.
3. Choosing Materials: It’s About “Vibe + Durability + Cost”
Shelf materials don’t just affect weight capacity and lifespan—they also shape how customers perceive your products.
1.Metal (Steel/Aluminum): Strength & Efficiency
- Pros: Sturdy, durable, ideal for heavy items and fast-turnover goods (drinks, rice, cleaning supplies).
- Vibe: Modern, industrial, sleek.
- Strategy: Metal shelves are a safe bet for high-density SKU aisles.
2. Wood (Solid/MDF): Warmth & Texture
- Pros: More “lifestyle-focused”—great for organic, premium, baked, or imported foods.
- MDF vs. Solid Wood: MDF is cheaper with a smooth surface (good for painting); solid wood is more durable and holds weight better but costs more.
- Note: Be careful with heavy items and high-humidity areas—calculate moisture resistance and weight capacity upfront.
3. Paper/Corrugated: Short-Term Promo Stars
- Pros: Low cost—perfect for new product launches and holiday events; lifespan is usually a few weeks to two months.
- Best for: Brand collaborations, holiday-themed displays, and product islands.
4. Acrylic/Plastic: Lightweight, Clean & Focused
- Pros: Transparent, light, and modern—great for small items, cosmetics, personal care, and loose candy.
- Note: Prone to scratches—have a cleaning and replacement plan.
5. Glass: Luxury & “Value Boost”
- Pros: Transparent, upscale, and perfect for lighting—ideal for high-ticket items like perfume, premium gift sets, and collectibles.
Note: Prioritize safety (shatterproof options); increase cleaning frequency.
4. Core of Shelf Creativity: Use “Strategic Display” to Change Buying Habits
1. “Eye Level = Buy Level”: Who Gets the Most Valuable Shelf?
Customers pay the most attention to items at eye to arm’s reach. Allocate this “golden shelf” based on your goals:
- Chase margin: Put high-margin, private label, or collaborative new products here.
- Build trust & efficiency: Place top brands here to reduce decision fatigue.
- Clear stock: Put clearance items on lower shelves but use bold labels and end caps to drive traffic.
- Research-backed: Eye-level displays can boost sales significantly compared to lower shelves—treat this prime real estate as a valuable resource.
2. “Rule of Three”: Our Brains Love Trios
Group products in threes (3 bottles, 3 boxes, 3 flavors)—it’s more balanced, visually appealing, and easier to notice. Perfect for:
- New flavor trios.
- “Solution sets” (main product + accessories + refills).
- Tiered displays of the same product in different sizes.
3. Visual Hierarchy: Control What Customers See First
Use three tools to guide attention:
- Grouping: Cluster items for the same scenario/need.
- Labels: Use shelf talkers (small standing signs) to highlight selling points/promos.
- Negative Space: Don’t overcrowd shelves—leaving “breathing room” makes key products feel more important and premium.
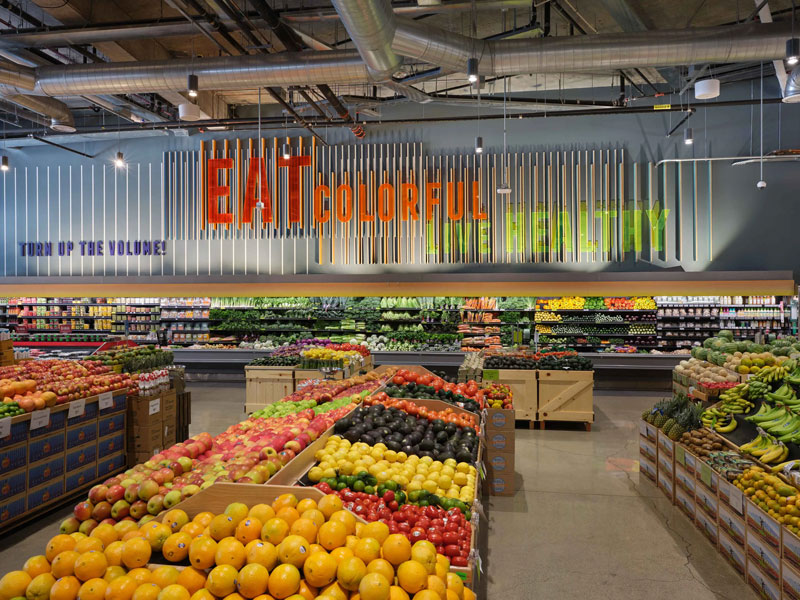
4. Color & Lighting: Let Shelves “Speak for Themselves”
- Color: Use high-contrast colors for promo labels; stick to brand colors for theme consistency.
- Lighting:
- Spotlight “hero products” (star items).
- Side lighting to highlight texture (great for baked goods, textiles).
Backlighting for glass/acrylic displays to add luxury.
5. End Cap Creative Templates: Treat End Caps as “Mini Theaters”
End caps need to do three things: Attract attention → Make sense → Be easy to grab. Here are 4 reusable templates:
Template 1: Seasonal Theme End Cap
- Theme: BBQ season, New Year’s supplies, back-to-school.
- Combo: Star product + complementary items (sauces, utensils, drinks).
- Info: One-sentence theme + 1 price anchor + optional countdown (if using digital screens).
Template 2: Problem-Solution End Cap
- Pitch: “Make [dish/meal] tonight—get everything here.”
- Use the Rule of Three to create kits.
- Big, bold text on top of the end cap to save customers time thinking.
Template 3: High-Margin Impulse End Cap
- Focus: Small packages, high margin, quick decisions.
- Display: Neat + dense (but not messy).
- Add signs like “Buy 2 for more savings” or “Second item [discount].”
Template 4: Clearance End Cap
- Message: Stick to one signal—”Clearance” or “Limited time.”
- Keep it simple: Don’t overcrowd with random items (it’ll look like a junk pile).
Use consistent price tag templates and colors to stay organized.
6. “Info Design” on Shelves: Shelf Talkers, Price Channels & Short Copy
Customers don’t have much patience in stores—shelf info needs to be “understood in 1 second.”
1. How to Use Shelf Talkers Effectively
- Highlight only one thing: Promo, selling point, new flavor, or health label.
- Use high-contrast colors + big fonts.
- Keep text to 8–12 words max—shorter is better.
2. Price Channels Boost Operational Efficiency
Shelves with built-in price channels keep price info consistent and easy to update—fewer mistakes, lost tags, or messy displays. Super important for chains: Standardization = efficiency.
3. Digital Upgrade: ESLs + Digital Screens
Pair electronic shelf labels (ESLs) for real-time pricing with digital screens for promos and content (recipes, pairings, member perks)—you’ll create a “shelf info loop” that’s accurate, timely, and flexible.
7. Mobility & Modularity: Let Shelves “Adapt Fast” for Promos & Seasons
Retail changes fast—shelves need to be rearrangeable:
- Modular gondola shelves: Adjust shelf height/depth as categories change.
- Mobile display units: Test new products, run holiday events, or do pop-up themes.
- Replaceable back panels: Swap pegboards/grid panels/slatwalls to support different items (hanging, shelf-stacked, basket-held).
Creativity isn’t a one-time thing—it’s about keeping your store feeling fresh, always.
8. Maintenance & Safety: Creative Shelves Only Make Money With Daily Upkeep
No matter how nice shelves look, they’ll go from “premium” to “cheap” fast if they’re out of stock, dusty, wobbly, or messy.
1. Daily Maintenance (Minimalist Checklist)
- Wipe down shelves and countertops.
- Face products forward (make sure labels are visible).
- Restock and fill empty spots.
- Disinfect high-touch areas (especially checkout POPs).
2. Weekly Maintenance
- Deep clean entire shelf units.
- Check for damaged products and signs.
- Special cleaning for glass/acrylic.
- Inspect shelf weight capacity and loose arms.
3. Safety First: Weight Capacity Matters
- Use deeper shelves and reinforced arms for heavy items (oil, drinks, rice).
- Store heavy stuff on lower shelves—safer and more stable.
- Regularly check for sagging shelves or bent arms.
9. Measure Shelf Creativity with Data: Don’t Just Say “It Looks Good”
To prove if your shelf ideas work, track these four metrics:
- Sales per Square Foot: How efficiently you’re using space.
- Sell-through Rate: How fast items sell after being stocked.
- Dwell Time: How long customers stop at a shelf (use heatmaps or foot traffic analytics).
- Conversion Rate: What percentage of browsers actually buy.
Easy A/B test: Put the same product on a regular aisle shelf vs. an end cap (with better labels/lighting/3-item grouping)—compare 1–2 weeks of data to decide what sticks.
10. Step-by-Step Shelf Creative Process (Ready to Use)
Step 1: Define your goal—boost margin? Launch new products? Clear stock? Increase average order value?Step 2: Pick shelf types and spots—gondolas for main aisles, wall shelves for themes, end caps for promos, checkout POPs for impulse buys, mobile shelves for events.Step 3: Build the display—put key items at eye level, use the Rule of Three, add negative space, and highlight with lighting.Step 4: Add info—consistent price tags, short shelf talkers, and digital screens if you have them.Step 5: Set up maintenance SOPs and rotation schedules—swap end caps every 1–2 weeks, daily restocks, weekly deep cleans.Step 6: Review data—tweak displays and spots based on sales, sell-through, dwell time, and conversion rate.
Wrap-Up: The Essence of Shelf Creativity? Make It Easy for Customers to Decide
Supermarket shelf creativity isn’t about flashy setups—it’s about making the “see → understand → grab” journey smoother:
- Use the right shelves to guide customer flow.
- Maximize attention with eye-level spots and visual hierarchy.
- Trigger impulse buys with end caps and POPs.
- Boost perceived value with lighting, materials, and negative space.
- Turn creativity into long-term growth with maintenance SOPs and data.
If you’re willing to share: your store size, main product categories, target customers (neighborhood store/campus store/premium boutique/discount shop), and your top goal (average order value/margin/sell-through/repeat visits)—I can help tailor this even more!